
CyberCode Academy
CyberCode Academy
0
CyberCode Academy is an educational podcast that teaches programming and cybersecurity through short, focused episodes. It is designed as an audio classroom, taking listeners from beginner to advanced levels one lesson at a time. The content covers topics like Python, web development, ethical hacking, and digital defense, breaking down complex concepts into simple and engaging audio lessons. It is free to listen and download on multiple platforms.
Episoder
-
 Course 45 - IE Data Center Network Design | Episode 1: Layer 2 Data Center Design 03.10.2026 25minLayer 2 Data Center Design & Endpoint MobilityEpisode OverviewModern data center networks must do more than simply connect servers. They must support workload mobility, continuous availability, scalable architectures, and intelligent integration of network services.In this episode, we explore the architectural principles behind high-performance Layer 2 and data center fabrics, beginning with the limitations of traditional Spanning Tree Protocol and progressing toward Virtual Port Channels, leaf-spine architectures, VXLAN, ECMP, and Layer 4–7 service integration.The goal is to understand how modern data center designs preserve the benefits of Layer 2 connectivity while introducing the scalability, redundancy, and fast convergence associated with Layer 3 architectures.1. Defining the Data Center Network Design GoalsA modern data center architecture should address three fundamental requirements.Endpoint and Workload MobilityVirtual machines and other workloads may need to move between physical hosts or network locations without requiring major changes to their network identity.The underlying network therefore needs to maintain connectivity while workloads move across the infrastructure.High AvailabilityCritical network paths should avoid single points of failure.Ideally, redundant links should not sit idle waiting for a failure. An active-active architecture allows available bandwidth to be used while maintaining redundancy.Services AwarenessApplications frequently depend on network services such as:- Firewalls.- Load balancers.- Proxy servers.- Other Layer 4–7 services.The network architecture must provide a clean mechanism for integrating these services into traffic flows.2. Understanding the Limitations of Spanning TreeTraditional Spanning Tree Protocol (STP) was designed to prevent Layer 2 switching loops by placing redundant paths into a blocked state.While this provides loop prevention, it introduces several challenges in modern data centers.Redundant links may remain unused during normal operation, resulting in inefficient bandwidth utilization.STP convergence can also introduce disruption during topology changes. Changes may trigger Topology Change Notifications (TCNs) and associated MAC-table behavior, potentially causing temporary flooding while the network relearns forwarding information.Another concern is that traditional Layer 2 designs can become increasingly difficult to scale as the number of endpoints and redundant paths grows.These limitations motivate architectures that can use multiple physical paths simultaneously.3. Virtual Port ChannelsVirtual Port Channels (vPC) provide a mechanism for presenting multiple physical switches as a logical port-channel endpoint from the perspective of connected devices.This allows a downstream device to establish links toward two switches while treating them as a single logical connection.The result can be represented conceptually as:Traditional Redundancy:Active Link + Standby LinkvPC-Based Design:Active Link + Active LinkBoth paths can therefore participate in forwarding while providing redundancy if one physical connection or switch becomes unavailable.4. Back-to-Back vPC ArchitecturesThe vPC concept can also be extended through back-to-back vPC designs, allowing multiple network devices to participate in highly available Layer 2 connectivity.The objective is to transform physical topologies that would traditionally require STP to block redundant paths into architectures where those paths can actively contribute to forwarding.This approach helps address two competing requirements:Redundancy + Bandwidth UtilizationInstead of maintaining unused physical links solely for failover, the architecture can make better use of available network capacity.5. Moving Toward Leaf-Spine ArchitecturesAs data centers scale, traditional hierarchical designs can become difficult to...
 -
 Course 44 - RH Security Specialist | Episode 12: Securing Linux with Nessus and IPTables 02.10.2026 20minHow can you determine whether a Linux server contains known security weaknesses—and how can you control the network traffic reaching those services?In this episode, we focus on two essential pillars of Linux server defense: proactive vulnerability assessment and active firewall protection.We begin with Nessus, exploring how vulnerability scanners identify operating systems, software versions, exposed services, and known security weaknesses. We then move into the defensive side of the equation with IPTables and the Linux netfilter framework, examining how host-based firewall rules can control network traffic and reduce the system's attack surface.The episode concludes with practical rule-management concepts, including rule ordering, traffic filtering, configuration persistence, and the importance of validating firewall behavior after changes.1. Introducing Vulnerability Scanning with NessusSecurity administrators cannot effectively protect systems without understanding their weaknesses.We begin by introducing Nessus Home, a vulnerability-assessment platform designed to help identify security issues within systems and networks.You will explore the process of:Obtaining and activating a Nessus license.Installing the Nessus package using RPM.Initializing the Nessus service.Accessing the management interface through a web browser.Preparing a vulnerability assessment.Reviewing the results generated by the scanner.This establishes the first major principle of the episode:You cannot effectively remediate vulnerabilities that you have not identified.2. Building an Advanced Vulnerability ScanOnce Nessus is operational, we examine how an advanced scan can gather information about a target environment.A vulnerability assessment may identify information such as:Operating-system characteristics.Running services.Software versions.Network exposure.Known vulnerabilities.Configuration weaknesses.Security recommendations.The objective is not simply to produce a list of vulnerabilities, but to understand the security posture of the system and determine which findings require attention.All scanning activities should be performed against systems you own or are explicitly authorized to assess.3. Understanding False PositivesAutomated vulnerability scanners are powerful, but they are not infallible.A scanner may sometimes report a vulnerability that does not actually exist. These findings are known as false positives.This introduces an important professional skill: security validation.When a vulnerability is reported, administrators should investigate the underlying evidence rather than automatically assuming the finding is accurate.A responsible assessment therefore follows this cycle:Scan → Analyze → Validate → Remediate → RescanUnderstanding false positives prevents unnecessary remediation while ensuring genuine vulnerabilities receive appropriate attention.4. Introducing IPTables and NetfilterAfter examining how vulnerabilities can be discovered, we shift toward preventing unwanted network access.IPTables provides a traditional command-line interface for managing Linux firewall rules, while the underlying packet-filtering functionality is provided by the Linux kernel's netfilter framework.Together, they allow administrators to control how network packets are processed by the system.Firewall policies can be used to:Permit legitimate network services.Restrict unnecessary connections.Block unwanted traffic.Limit exposure to untrusted networks.Reduce the attack surface of a server.This is particularly important because threats do not always originate from outside the organization. A compromised...
 -
 Course 44 - RH Security Specialist | Episode 11: System Tracking and Port Reconnaissance 01.10.2026 14minHow do you know whether a Linux server is actually secure?Security professionals need more than preventive controls. They need the ability to monitor system activity, investigate suspicious behavior, audit sensitive resources, and verify what is exposed to the network.In this episode, we move from detailed internal auditing with the Linux Audit System to active network reconnaissance and firewall verification. You will learn how to manage and search audit data, create targeted monitoring rules, generate security reports, scan network services with Nmap, and validate the effectiveness of local firewall controls.The result is a practical security workflow that combines visibility, investigation, reconnaissance, and defensive verification.1. Managing the Linux Audit DaemonWe begin with the Linux Audit Daemon (auditd), which provides a framework for recording security-relevant events generated by the operating system.You will explore how administrators manage the audit service and its log lifecycle, including:Starting and stopping the auditing service.Managing audit log generation.Controlling log growth and rotation.Resuming auditing after maintenance or configuration changes.Understanding the relationship between audit configuration and stored event data.Effective audit management ensures that security records remain useful without allowing audit data to become an uncontrolled storage problem.2. Creating Real-Time Audit Rules with AuditctlAfter understanding the audit service itself, we move to auditctl, the command-line interface used to manage active audit rules.Rather than collecting every possible event, security administrators can define specific resources and activities that deserve additional monitoring.A practical example is monitoring a sensitive SSH configuration file such as:/etc/ssh/sshd_configA file watch can provide visibility when the configuration is accessed or modified, helping administrators identify unexpected changes to a critical remote-access component.This introduces an important auditing principle:Monitor the resources whose modification could materially affect system security.3. Searching Audit Data with AusearchGenerating audit records is only the beginning. Large audit logs are valuable only when administrators can efficiently search and interpret them.This is where ausearch becomes important.You will learn how to search audit records for specific categories of activity, including:Failed authentication events.Login-related activity.Account and group modifications.Events associated with particular users.Activity within defined time periods.Events associated with specific audited resources.Instead of manually reading thousands of raw records, targeted searches allow security analysts to quickly isolate events relevant to an investigation.4. Turning Audit Data into Reports with AureportWhile ausearch is useful for targeted investigations, aureport provides a broader reporting perspective.You will explore how aureport can transform detailed audit information into structured, human-readable summaries.These reports can help administrators understand:Authentication activity.Failed login attempts.Executable activity.User behavior.System-level events.Network-related audit information.Patterns that may indicate suspicious activity.This makes audit reporting useful not only to security analysts, but also to administrators who need a high-level overview of system activity.5. Detecting Suspicious Authentication ActivityAuthentication failures are particularly valuable from a security perspective.Repeated failed login attempts against a particular account or...
 -
 Course 44 - RH Security Specialist | Episode 10: Linux System Logging and Auditing 30.09.2026 21minA secure Linux environment is only as effective as your ability to understand what is happening inside it.Servers continuously generate information about authentication attempts, system activity, application behavior, administrative actions, and security events. Without proper log management and auditing, this information can become difficult to analyze, consume valuable storage, or disappear entirely when an attacker compromises the system.In this episode, we explore three essential pillars of Linux system visibility and security monitoring: log management, centralized remote logging, and system auditing.You will learn how administrators and cybersecurity professionals manage large volumes of log data, preserve security evidence on centralized systems, and monitor critical operating-system activity through the Linux auditing framework.1. Managing Linux Logs with LogrotateLinux systems can generate enormous amounts of log data over time. If these files are allowed to grow indefinitely, they can eventually consume available disk space and negatively affect system stability.We begin by examining the importance of sustainable log management and introduce logrotate, a utility designed to automate the lifecycle of log files.You will explore how log rotation can:Prevent individual log files from growing without limits.Create new log files according to a defined schedule.Compress older logs to reduce storage requirements.Retain historical logs for investigation and troubleshooting.Automatically remove logs that have exceeded the configured retention period.The episode demonstrates the practical impact of compression by showing how a large text-based log can be reduced dramatically in size, illustrating why automated log management is essential on production systems.2. Understanding Log Rotation PoliciesEffective logging is not simply about collecting information. Administrators must also decide how long logs should be retained, when they should be rotated, and how historical records should be stored.We examine the configuration principles behind logrotate and how rotation policies can be adapted to different operational requirements.This introduces an important security balance:Visibility vs. StorageKeeping every log forever may be impractical, while deleting logs too quickly can eliminate valuable evidence during a security investigation.A properly designed retention strategy therefore considers:Log volume.Storage capacity.Operational requirements.Compliance requirements.Incident-response needs.Retention periods.3. Centralized and Remote Logging with RsyslogLocal logs can become unreliable when the system generating them is compromised.An attacker who gains administrative access to a server may attempt to modify, delete, or manipulate local evidence. This is why security-conscious environments often forward important events to a centralized logging infrastructure.Using rsyslog, we explore the concept of remote logging and how multiple Linux systems can transmit their events to a centralized repository.The architecture can be represented as:Linux Clients → Remote Log Transport → Central Log Server → Security MonitoringCentralized logging provides several advantages:Consolidates events from multiple systems.Simplifies monitoring and investigation.Reduces dependence on individual machines.Helps preserve evidence outside a compromised host.Makes it easier to correlate activity across infrastructure.The episode also introduces the importance of protecting the communication channel and designing centralized logging with appropriate access controls and transport security.4. Designing a Central Logging ArchitectureOnce logs are...
 -
 Course 44 - RH Security Specialist | Episode 9: Identity Management (IdM) and System Logging 29.09.2026 23minThis episode explores two essential components of enterprise Linux administration and security: centralized identity management and system logging.The lesson begins with the deployment of an Identity Management (IdM) Server, covering the process of establishing a centralized authentication and authorization environment. You will configure the server's hostname, Kerberos realm, time synchronization, administrative access, and secure web interface.The episode then moves to IdM Client configuration, demonstrating how Linux systems can join the centralized identity infrastructure and communicate with the IdM server. Finally, the lesson introduces rsyslog, showing how administrators can organize, filter, prioritize, and route system events into dedicated log files.Together, these technologies establish two critical security capabilities:Centralized Identity → Controlled Access → Centralized Visibility1. Deploying an Identity Management ServerThe episode begins with the deployment of an Identity Management (IdM) Server on an Enterprise Linux environment.The server acts as a centralized authority for managing identities, authentication, groups, and access-related information across participating systems.The installation process covers the required directory, authentication, and security components needed to establish the IdM infrastructure.This creates the foundation for managing multiple Linux systems from a centralized security platform rather than maintaining independent local accounts on every server.2. Establishing Hostname and Network IdentityCorrect system identity is particularly important in centralized authentication environments.The episode demonstrates how to configure the server's hostname and establish reliable communication between the participating systems.The lesson emphasizes the relationship between:Hostname → Network Resolution → Authentication Services → Identity ManagementProper name resolution and consistent host configuration are essential for services such as Kerberos and centralized identity management to function correctly.3. Configuring Kerberos and Time SynchronizationA major component of the IdM environment is Kerberos, which provides a centralized authentication mechanism based on trusted identities and time-sensitive authentication tickets.The episode introduces the configuration of the Kerberos realm and explains why accurate system time is critical to authentication.Time synchronization is configured using NTP, helping ensure that the IdM server and participating clients maintain consistent clocks.This establishes an important dependency:Accurate Time → Valid Kerberos Authentication → Reliable Identity Services4. Securing Administrative AccessOnce the IdM server is deployed, administrators need a secure method for managing the environment.The episode introduces the IdM web interface, which is accessed through HTTPS.The initial environment uses a self-signed certificate, allowing encrypted communication with the administrative interface while the system is being established.The lesson highlights the importance of protecting administrative interfaces and ensuring that credentials and management traffic are not transmitted through unencrypted channels.5. Configuring the IdM ClientAfter establishing the central server, the episode moves to configuring an IdM Client.The client must be able to locate and communicate with the IdM server. The lesson demonstrates how private IP addressing and local hosts-file configuration can be used within a controlled environment to establish reliable connectivity between the systems.The overall architecture becomes:IdM Server → Central Identity Authority → IdM Client → Centralized User AuthenticationThis approach allows multiple Linux systems to participate in a common identity infrastructure.6. Managing User Home DirectoriesCentralized authentication introduces an important practical consideration: users authenticated through the IdM infrastructure may not...
 -
 Course 44 - RH Security Specialist | Episode 8: Console Security and SSH Banners 28.09.2026 23minThis episode explores essential Linux system-hardening techniques designed to protect both physical console access and remote administration interfaces.The lesson focuses on three practical security controls: disabling the Ctrl+Alt+Del reboot mechanism, protecting the GRUB bootloader with authentication, and configuring pre-login SSH warning banners.Together, these measures demonstrate how Linux security extends beyond file permissions and network controls. A properly hardened system must also account for physical access, boot-time manipulation, administrative boundaries, and legal access notifications.1. Protecting the Console from Unauthorized RebootsPhysical access to a server can provide an attacker with opportunities that are unavailable through normal remote access.One simple example is the Ctrl+Alt+Del keyboard sequence, which can trigger a system reboot when configured to do so.The episode demonstrates how administrators can disable this behavior to prevent unauthorized users from rebooting a server directly from the console.2. Managing Ctrl+Alt+Del Across Linux VersionsThe configuration required to disable the reboot shortcut varies depending on the Linux release and initialization system.The episode examines several approaches used across Red Hat and CentOS environments, including:Legacy Upstart-based configurationsOverride configuration filesModern systemd behaviorsystemd maskingGraphical desktop environmentsThe lesson also demonstrates how ignored reboot attempts can be logged, providing an additional audit trail for physical-access events.For systems using traditional security logging, administrators can monitor relevant activity through:/var/log/secure This illustrates an important hardening principle:Security controls should not only prevent unwanted actions; they should also provide visibility into attempted violations.3. Disabling the Shortcut with systemdModern Linux distributions commonly use systemd, which provides a centralized way to manage system services and targets.The episode demonstrates how the Ctrl+Alt+Del action can be disabled by masking the corresponding systemd target.This approach prevents the associated action from being triggered through the keyboard shortcut while allowing normal system operation to continue.The lesson also highlights the importance of understanding the initialization framework used by the target operating system before applying a hardening procedure.4. Securing the GRUB BootloaderProtecting the operating system is not enough if an attacker can manipulate the boot process.The GRUB bootloader can provide access to boot parameters and recovery options that may significantly affect system security.Without appropriate protection, someone with physical access could potentially modify boot parameters or attempt to enter privileged recovery environments.The episode therefore introduces GRUB password protection as another layer of physical security.5. Understanding GRUB AuthenticationThe lesson demonstrates the process of generating a password hash for GRUB using:grub-md5-crypt The resulting hash can then be incorporated into the GRUB configuration so that sensitive bootloader modifications require authentication.This creates an important distinction between:Normal system bootingEditing or modifying bootloader configurationWith appropriate configuration, authorized users can continue normal boot operations while unauthorized attempts to modify boot parameters are restricted.Modern security note: MD5-based GRUB authentication is a legacy technique associated with older GRUB configurations. Modern GRUB 2 deployments should use the stronger password mechanisms supported by the installed distribution and version.6. Defending Against Boot-Time Authentication BypassBootloader protection is particularly important because the boot process...
 -
 Course 44 - RH Security Specialist | Episode 7: Linux Group Security and the Power of PAM 27.09.2026 22minThis episode explores two fundamental components of Linux access control: group administration and Pluggable Authentication Modules (PAM).The lesson begins with practical group management, examining how administrators can organize users around shared resources and delegate specific group-management responsibilities without granting full root privileges. From there, the episode moves into the architecture of PAM, revealing how Linux separates authentication, account validation, password management, and session handling into a flexible modular framework.By the end of the episode, you will understand how Linux manages group membership, how authentication decisions are processed through PAM, and how multiple security modules can be combined to enforce stronger access-control policies.1. Managing Linux GroupsLinux groups provide an essential mechanism for organizing users and controlling access to shared resources.Instead of assigning permissions individually to every user, administrators can place users into groups and use group ownership and permissions to manage collaborative environments.The episode explores:Creating and managing groupsAssigning users to groupsManaging group administratorsUnderstanding group ownershipUsing groups to control access to shared directoriesDelegating selected group-management responsibilitiesThis establishes the foundation for more advanced Linux access-control techniques.2. Group Administration and Delegated PrivilegesLinux provides mechanisms that allow designated group administrators to manage membership without requiring unrestricted root access.The gpasswd utility can be used to manage group membership and group administrators.This introduces an important security principle:Delegate only the privileges required for a specific administrative task.Rather than giving a user complete administrative authority, group-level delegation can allow them to manage a particular resource while keeping the rest of the system protected.3. Understanding the /etc/gshadow FileThe episode also examines the role of:/etc/gshadow The gshadow database contains security-sensitive information associated with Linux groups, including group passwords and administrative relationships.Understanding the separation between traditional group information and protected group authentication data provides useful insight into how Linux manages privileged group operations.Because this file contains sensitive authentication information, it should be protected with appropriate ownership and permissions.4. Dynamically Assuming Group MembershipLinux also provides mechanisms for users to temporarily work with a different group identity.The newgrp command can be used to switch the current shell's effective group context, allowing users to work with resources associated with another group when authorized.This can be particularly useful in collaborative environments where users need to create files that inherit a shared group context.The episode demonstrates how group passwords and group configuration can support controlled transitions between group contexts without permanently changing a user's primary group.5. Understanding Pluggable Authentication ModulesAfter establishing the fundamentals of Linux groups, the episode transitions into one of the most important components of Linux authentication:Pluggable Authentication Modules (PAM).PAM provides a modular authentication framework that allows applications to rely on standardized authentication components rather than implementing authentication logic independently.This architecture makes it possible to modify authentication policies without requiring every application to be rewritten.PAM is commonly involved in areas such as:System loginsPassword authenticationAccount restrictionsSession...
 -
 Course 44 - RH Security Specialist | Episode 6: Locking Down the File System 26.09.2026 18minThis episode provides a practical guide to strengthening Linux file system security, progressing from protecting shared directories against accidental or unauthorized deletions to implementing granular access controls and continuously monitoring system integrity.The lesson focuses on three essential Linux security mechanisms: the Sticky Bit, File Access Control Lists (FACL), and the Advanced Intrusion Detection Environment (AIDE). Together, these technologies provide multiple layers of protection for shared resources, user permissions, and critical system files.1. Preventing Unauthorized Deletions with the Sticky BitShared directories often require multiple users to have write access. However, traditional write permissions can create a problem: users may be able to delete or rename files created by other users.The Sticky Bit provides an additional layer of protection for these environments.Key ConceptsThe episode demonstrates how to enable the Sticky Bit using:chmod o+t When applied to a shared directory, the Sticky Bit restricts file deletion and renaming so that these operations can generally be performed only by:The file ownerThe directory ownerThe root userThis makes the Sticky Bit particularly useful for shared workspaces and temporary directories where multiple users need write access without gaining control over one another's files.2. Implementing Granular Permissions with FACLTraditional Linux permissions are based on three primary ownership categories:UserGroupOthersWhile this model is effective for many scenarios, it can become restrictive when a specific user needs additional permissions without changing the ownership or group structure.File Access Control Lists (FACL) provide a more granular solution.The episode introduces the primary tools used to manage ACLs:setfacl getfacl With FACL, administrators can assign specific permissions to individual users or groups while preserving the existing standard Unix permission model.Managing ACL PermissionsThe lesson demonstrates how to:Grant read and write access to specific usersInspect existing ACL configurationsModify individual ACL entriesUse ACL masks to control the maximum effective permissionsConfigure default ACLs for permission inheritanceEnsure newly created files and directories receive the intended access rulesThis provides a much more flexible permission model for multi-user Linux environments.3. Understanding ACL MasksACL masks provide an important mechanism for controlling the maximum effective permissions available to ACL users and groups.Rather than modifying every individual ACL entry, administrators can use the mask to restrict the effective permissions applied across multiple entries.This becomes especially useful when managing complex shared directories where permissions must be adjusted without rebuilding the entire ACL configuration.The episode also demonstrates how to inspect the resulting ACL entries and distinguish between configured permissions and their effective permissions.4. Configuring Persistent ACL SupportFor ACL-based access control to remain reliable across system reboots, the underlying file system must support ACL functionality.The episode explains how mount configuration can be managed through:/etc/fstab This provides a foundation for ensuring that ACL-related behavior remains consistent as file systems are mounted and managed by the operating system.The broader lesson is that file system security is not only about assigning permissions; it also requires understanding how storage configuration affects those permissions.5. Monitoring System Integrity with AIDEFile permissions control who can access resources, but they do not necessarily reveal whether important system files have been...
 -
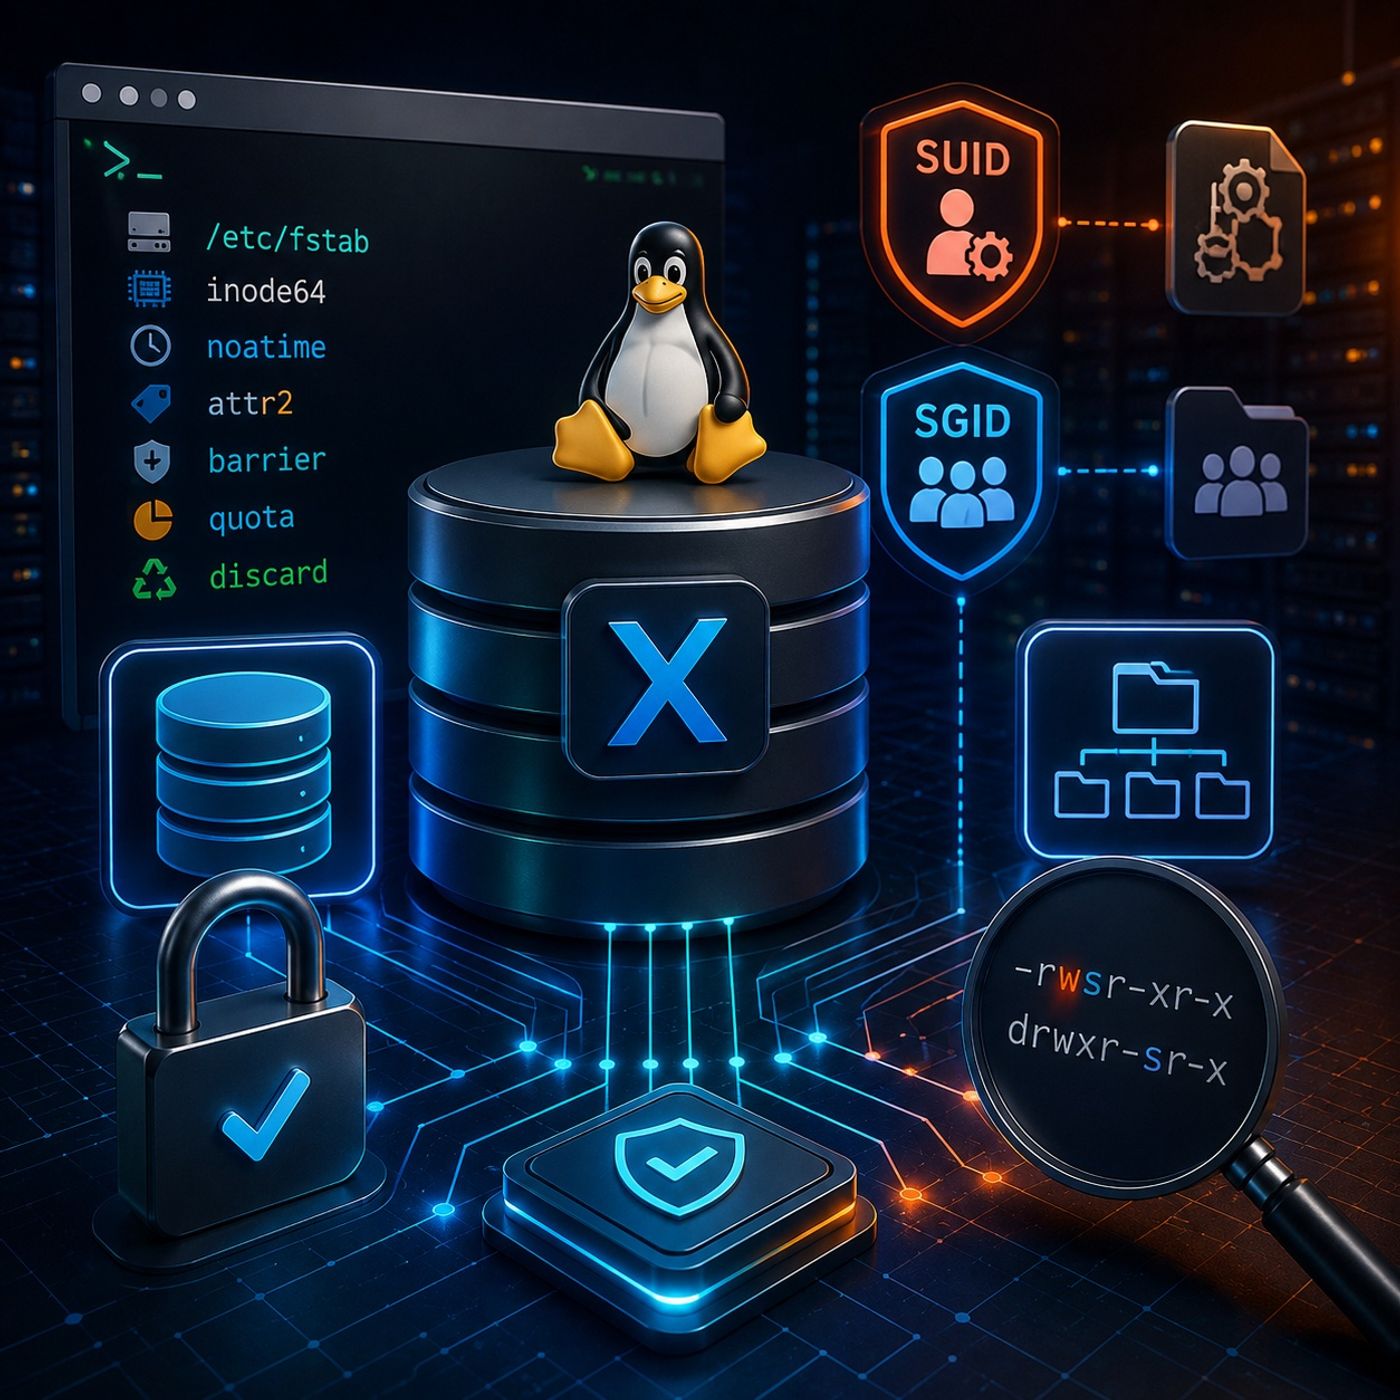 Course 44 - RH Security Specialist | Episode 5: Mastering Linux Permissions 25.09.2026 25minAdvanced Linux administration requires a deeper understanding of both filesystem behavior and Unix permission mechanisms. In this episode, we explore the powerful capabilities of the XFS filesystem and examine special permission mechanisms that can significantly influence how users and applications interact with the operating system.We begin with XFS administration, focusing on filesystem mount options, auditing precision, storage quotas, SSD optimization, and large-volume performance. We then transition into SUID (Set User ID) and SGID (Set Group ID), exploring how these special permissions affect executable files and shared directories.Through practical examples and command-line exercises, this episode demonstrates how seemingly small filesystem and permission settings can have major consequences for security, performance, and multi-user system administration.1. Exploring the XFS File SystemWe begin by examining the architecture and administrative characteristics of XFS, a filesystem widely associated with enterprise Linux environments.The discussion focuses on why XFS became an important default filesystem choice in Red Hat Enterprise Linux 7 and how its design supports large-scale storage and demanding workloads.Key topics include:XFS filesystem characteristics.Large-volume scalability.Filesystem mount configuration.Performance-oriented filesystem options.Security and integrity considerations.Understanding these fundamentals provides the foundation for configuring XFS appropriately for different enterprise workloads.2. Advanced XFS Mount OptionsWe then examine several important XFS mount options and how they influence filesystem behavior.Extended AttributesExtended attributes allow additional metadata to be associated with filesystem objects.We explore their role in modern Linux security and application functionality, including their relationship with security frameworks and access-control mechanisms.Subsecond TimestampsPrecise timestamps can be important for auditing and forensic analysis.We examine filesystem timestamp behavior and how subsecond timestamp precision can provide more detailed information when tracking changes to files and system activity.Write BarriersWrite barriers help maintain filesystem consistency by coordinating how data reaches persistent storage.We examine why write ordering matters and how barrier-related configuration must be considered carefully when balancing performance against data-integrity requirements.3. Managing Disk Space with XFS QuotasStorage management becomes increasingly important as enterprise systems grow.We introduce XFS quotas as a mechanism for controlling and monitoring filesystem resource consumption.The episode explores:User and group storage limits.Preventing individual accounts from consuming excessive disk space.Monitoring filesystem usage.The relationship between quotas and multi-user environments.Quotas provide administrators with an additional layer of resource governance and help prevent uncontrolled storage consumption from affecting other users or services.4. SSD and Virtual Storage OptimizationModern Linux systems frequently rely on SSDs, virtual disks, and thin-provisioned storage.We examine discard functionality and its relationship with storage devices and virtualized environments.Discard operations can communicate that previously used storage blocks are no longer required, allowing compatible storage systems to reclaim that capacity.The discussion emphasizes the importance of understanding the underlying storage architecture before enabling performance or space-reclamation options.5. Optimizing Large XFS Volumes with inode64As storage systems grow into multi-terabyte configurations, filesystem metadata placement can become an important performance consideration.We...
 -
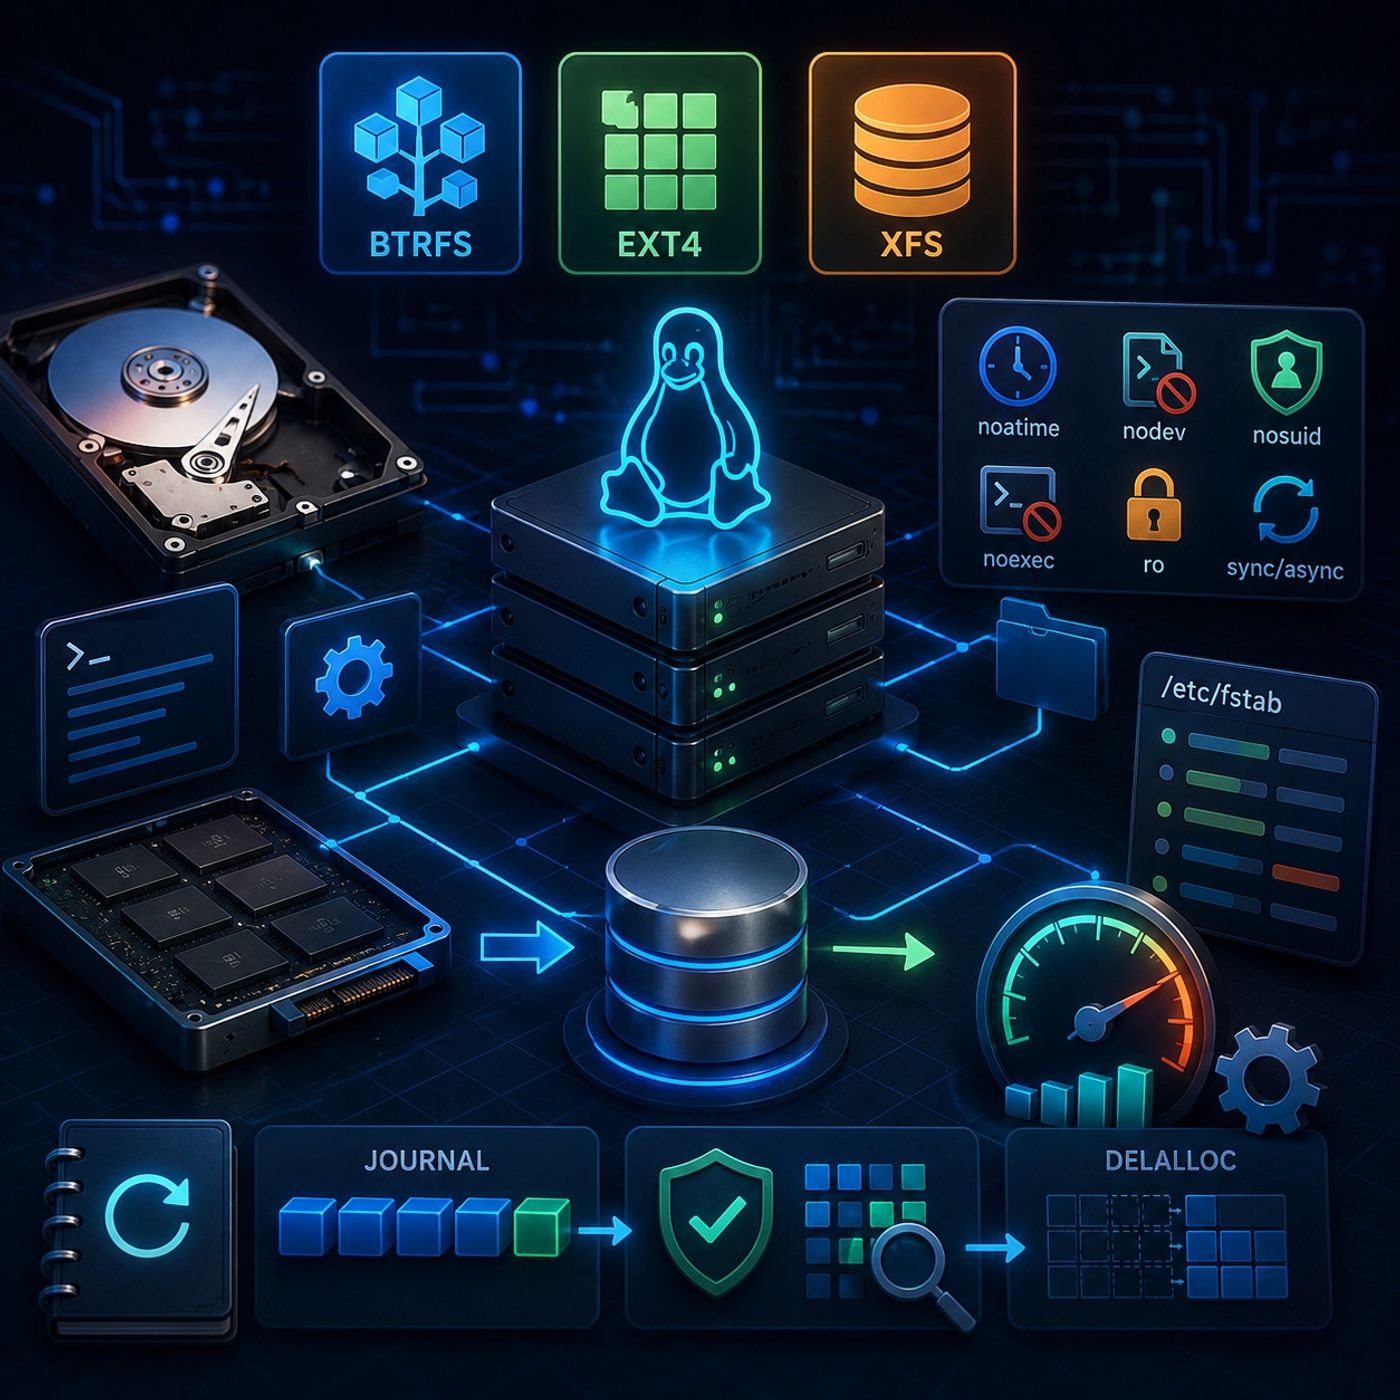 Course 44 - RH Security Specialist | Episode 4: Performance, Security & Mount Options 24.09.2026 12minLinux storage management goes far beyond formatting a disk and mounting it. Understanding how modern Linux file systems work—and how their configuration affects security, reliability, and performance—is an essential skill for system administrators and security professionals.In this episode, we move from the architectural foundations of Linux file systems into practical storage administration and advanced performance tuning. We compare Btrfs, ext4, and XFS, examine how storage devices are provisioned and mounted, and explore how carefully selected mount options can improve both system security and operational efficiency.The episode concludes with a deeper look at ext4 journaling and performance optimization, demonstrating how filesystem-level configuration can influence reliability, recovery behavior, and write performance.1. Understanding the Major Linux File SystemsWe begin by comparing three important file systems commonly encountered in Linux environments:BtrfsBtrfs is a modern Copy-on-Write filesystem built around B-tree structures. We examine its architectural approach and how Copy-on-Write can provide advanced storage-management capabilities.ext4ext4 is one of the most widely used Linux file systems, known for its stability, maturity, and broad compatibility.We explore its design characteristics, storage capabilities, and why it remains a dependable choice across many Linux environments.XFSWe also examine XFS, which has historically been an important filesystem choice in enterprise Linux environments, particularly where scalability and high-performance storage are priorities.Comparing these filesystems provides a foundation for understanding why administrators may choose one over another depending on workload, compatibility requirements, scalability, and performance objectives.2. Provisioning and Formatting StorageThe theoretical comparison is followed by hands-on storage administration.We examine the process of preparing a virtual disk and turning raw storage into a usable Linux filesystem.The workflow covers:Identifying available storage devices.Preparing a virtual disk for filesystem use.Formatting storage using appropriate mkfs utilities.Creating filesystems such as ext4 and XFS.Mounting filesystems for immediate use.Understanding the relationship between block devices, filesystems, and mount points.This practical workflow demonstrates the complete path from raw storage to an accessible Linux filesystem.3. Persistent Mounting with /etc/fstabA filesystem mounted manually may disappear from the active system after a reboot.To create a persistent storage configuration, we examine /etc/fstab and its role in defining filesystems that should be mounted automatically.We explore:Device identification.Mount points.Filesystem types.Mount options.Persistent filesystem configuration.The importance of validating mount configurations before rebooting.Understanding /etc/fstab is essential because an incorrect entry can affect the boot process or prevent a filesystem from being mounted as expected.4. Filesystem Mount Options and Security HardeningMount options provide administrators with another layer of system control.We examine several options that affect filesystem behavior, performance, and security.async and syncThese options control how filesystem writes are handled.We explore the trade-offs between asynchronous and synchronous write behavior and how administrators must balance performance against data-safety requirements.atime and noatimeAccess-time tracking can generate additional filesystem activity.We examine how disabling unnecessary access-time updates with noatime can reduce filesystem overhead in appropriate environments.nodevThe nodev option prevents device files from being...
 -
 Course 44 - RH Security Specialist | Episode 3: From Standards to LUKS Encryption 23.09.2026 22minA secure Linux server begins with more than a hardened configuration file. Enterprise security requires a layered approach that protects the system from physical tampering, unauthorized remote access, insecure services, filesystem abuse, and exposure of sensitive data.In this episode, we move from fundamental operating system hardening to advanced protection for data at rest. We examine how administrators can establish a secure server baseline, strengthen remote administration, safely manage system services, and use Linux Unified Key Setup (LUKS) to protect sensitive storage.The episode emphasizes a core security principle throughout: no single security control is sufficient on its own. Effective server security comes from multiple complementary layers.1. Physical and Environmental SecuritySecurity begins at the physical layer.Even a carefully configured Linux server can be compromised if an unauthorized individual can physically access the machine. We examine practical controls designed to prevent unauthorized interaction with the underlying hardware.Key topics include:Restricting physical access to server systems.Protecting the BIOS configuration.Preventing unauthorized booting from external or removable media.Understanding why physical access can undermine otherwise strong operating system controls.Designing storage layouts that isolate critical filesystem areas.We also explore why separate disk partitions are an important administrative consideration. Isolating areas such as user data and system files can help prevent one filesystem from consuming all available storage and causing broader service disruption.2. Establishing a Linux Hardening BaselineOnce physical access is controlled, the operating system itself must be hardened.We examine several foundational controls that can significantly reduce the attack surface of an enterprise Linux server.Host-Based Firewall ProtectionA local server firewall provides an additional defensive layer by controlling which network connections are permitted to reach the system.This is particularly important in environments where threats may originate from within the same broader network rather than exclusively from the public Internet.Identifying World-Writable DirectoriesWe also examine the security implications of directories that allow broad write access.World-writable locations can introduce opportunities for unauthorized file manipulation, making it important for administrators to identify and evaluate these permissions as part of a regular security assessment.The Sticky BitThe sticky bit provides an additional filesystem-level protection mechanism for shared writable directories.It helps ensure that users cannot arbitrarily delete or rename files belonging to other users, even when the directory itself is writable by multiple accounts.Together, these controls establish a stronger baseline for filesystem and network security.3. Hardening SSH and Remote AdministrationRemote administration is one of the most important areas to secure because SSH frequently represents a primary management interface for Linux infrastructure.The episode explores several SSH hardening practices, including:Enforcing modern SSH protocol configurations.Disabling direct remote root logins.Using sudo for controlled administrative operations.Maintaining traceable administrative activity through privilege escalation logging.Configuring appropriate legal and administrative login banners.The objective is not simply to make remote access more restrictive, but to make administrative activity more accountable, auditable, and controlled.Instead of allowing administrators to connect directly as root, controlled privilege escalation provides better visibility into who performed administrative actions.4. Managing Legacy and...
 -
 Course 44 - RH Security Specialist | Episode 2: Mastering Yum Updates and RPM Verification 22.09.2026 23minMaintaining a secure and reliable Linux environment requires more than simply installing the latest software. Administrators must understand how security updates are identified and applied, how package authenticity is established, and how installed software can be inspected and verified at a lower level.In this episode, we explore the security-focused package management workflows used across Red Hat and CentOS environments. Starting with automated security patching through Yum, we progress into cryptographic package verification and finally examine direct package management with RPM.The goal is to build a practical understanding of how Linux administrators can keep systems patched, maintain a trusted software supply chain, and detect unexpected changes to installed packages.1. Targeted Security Patching with YumWe begin with proactive vulnerability management and security patching.Rather than updating every available package indiscriminately, Yum can be used to identify and apply updates specifically related to security advisories. This allows administrators to reduce unnecessary system changes while prioritizing vulnerabilities that require immediate attention.Key topics include:Installing and configuring the Yum security functionality.Reviewing available security advisories.Examining outstanding security updates before installation.Filtering updates according to severity, including Critical advisories.Applying security-only updates with options such as yum update --security.Understanding how targeted patching can reduce unnecessary system changes.This workflow demonstrates an important principle of enterprise Linux administration: patch deliberately, not blindly.2. Understanding the Cryptographic Chain of TrustInstalling a package means trusting the software that is being introduced into the operating system. Linux package management therefore relies on cryptographic mechanisms to help verify package authenticity.We examine how GPG key pairs establish a chain of trust between software publishers and package consumers.The episode covers:The difference between public and private cryptographic keys.How package signatures help establish authenticity.Inspecting trusted public keys installed on a system.Querying GPG-related RPM packages with:rpm -qa gpg-pubkey*Understanding Yum's gpgcheck=1 configuration.Why signature verification is an important defense against untrusted or modified packages.This section connects package management with a broader security concept: software should be trusted because its integrity and origin can be verified, not simply because its filename or download location looks legitimate.3. Verifying Locally Downloaded PackagesPackage verification becomes particularly important when software has been downloaded manually rather than retrieved directly through a configured repository.We examine how administrators can verify a local package before installation by checking both its integrity and cryptographic signature.The workflow introduces:Package integrity checks.Cryptographic signatures.Manual package validation.The rpm -K verification command.The importance of verifying packages before introducing them into a system.This provides a practical foundation for understanding software supply-chain security at the operating-system level.4. Yum vs. Direct RPM OperationsYum provides a high-level package management experience, while RPM operates closer to the package database and individual package files.We compare these two approaches and examine when each is appropriate.A particularly useful workflow is installing a locally downloaded package through Yum, allowing dependency...
 -
 Course 44 - RH Security Specialist | Episode 1: Hardening, the CIA Model, and Professional Success 21.09.2026 16minThis episode, we shift our focus from application development to the security of the underlying server infrastructure.A newly deployed server can quickly become a target for automated scanning, credential attacks, and other unauthorized activity. Building a secure environment therefore requires more than simply installing an operating system and deploying applications. It requires a layered security strategy that combines physical protection, technical controls, and well-defined administrative procedures.This episode provides a practical framework for understanding how secure server environments are designed, monitored, tested, and maintained.1. The Three Pillars of SecurityWe begin by examining the three major categories of security controls used to protect organizational infrastructure.Physical ControlsPhysical security protects the actual hardware and facilities hosting critical systems.Examples include:Biometric authenticationCCTV monitoringControlled facility accessReinforced doors and physical barriersRestricted access to server roomsThese controls establish the first layer of defense against unauthorized physical access.Technical ControlsTechnical controls protect systems through technology-based mechanisms.The episode explores concepts such as:EncryptionAccess Control ListsAuthentication mechanismsNetwork security controlsSystem hardeningThese controls form the primary technological barrier between protected resources and unauthorized users.Administrative ControlsSecurity also depends on policies, procedures, and human behavior.Administrative measures include:Security awareness and user trainingAccess-management policiesLeast-privilege principlesDisaster recovery planningOrganizational security proceduresTogether, these three categories create a defense-in-depth strategy rather than relying on a single security mechanism.2. Understanding the CIA TriadNext, we examine one of the fundamental models of information security: the CIA Triad.The three principles are:Confidentiality — ensuring information is accessible only to authorized individuals.Integrity — protecting information from unauthorized modification or destruction.Availability — ensuring systems and information remain accessible when required.Understanding these principles provides a framework for evaluating security controls and determining what a particular system needs to protect.3. Tracking VulnerabilitiesWe then explore how security professionals identify and track publicly documented vulnerabilities.The National Vulnerability Database (NVD) provides a structured source of vulnerability information, allowing security teams to research known weaknesses and assess whether their systems may be affected.The episode also examines the importance of configuring appropriate security notifications and alerts through relevant enterprise platforms so that administrators can remain informed about newly disclosed vulnerabilities and emerging security risks.4. Safe Vulnerability TestingA critical part of professional security work is understanding where and how testing should be performed.We discuss why vulnerability assessments and penetration tests should not be conducted against production systems without proper authorization, planning, and safeguards.Instead, organizations should use controlled environments such as:Development environmentsStaging serversDedicated security laboratoriesIsolated virtual machinesTesting in these environments reduces the possibility of accidental outages, data corruption, service disruption, or other...
 -
 Course 43 - Practical Malware Development | Episode 9: Finalizing Client-Side Command & Control 20.09.2026 24minThis final hands-on integration session, we bring the client-side component and the central control panel together into a complete communication workflow.The episode focuses on transforming an isolated client application into an integrated node capable of registering its system information, periodically checking for pending tasks, processing authorized instructions, and returning execution results to the backend.For educational purposes, this architecture should be operated exclusively within an authorized laboratory, isolated test environment, or controlled security research network.1. Registering the Client NodeWe begin by configuring the client application to communicate with the server-side backend.The client is provided with the appropriate network endpoint and constructs an HTTP POST request containing system metadata such as:Host nameIP addressOperating systemThe request is sent to the registration endpoint, allowing the backend to create or update the corresponding client record in the database.This establishes the initial relationship between the client application and the control panel.2. Building the Command Polling LoopOnce registration is complete, we implement the client's continuous communication loop.Using a while loop, the client periodically contacts the server to determine whether a new task is available for its associated record.The process follows a repeating cycle:Check In → Retrieve Pending Task → Process Task → Return Result → Check In AgainThis introduces the concept of a persistent polling-based architecture and demonstrates how a client can maintain communication with a centralized backend.3. Refactoring the Command ParserThe next step is modifying the internal command-processing logic so that it can return useful execution information.Rather than simply performing an operation without producing a return value, the parser is refactored from a void-style workflow into one that returns a string.This allows the application to capture textual results from supported system operations, such as network configuration information or directory listings, and pass those results to the communication layer.The resulting architecture separates two responsibilities:Command processing: Determines what operation should be performed and produces its result.Network communication: Transmits that result back to the backend.This separation makes the overall application easier to understand and extend.4. Returning Processing ResultsAfter processing a task, the client packages the resulting output into an HTTP request and submits it to the server's result-handling endpoint.The backend then associates the returned information with the appropriate database record.This completes the communication cycle:Server Task → Client Processing → Result Generation → HTTP Submission → Database UpdateThe control panel can subsequently retrieve the updated information for administrative monitoring.5. Optimizing Command State ManagementOn the server side, we refine the database workflow so that consumed commands are automatically cleared from the corresponding record.This prevents previously processed tasks from remaining in a pending state and being repeatedly returned to the client.Proper state management ensures that each task progresses through a predictable lifecycle:Pending → Retrieved → Processed → ClearedThis also helps keep the administrative interface synchronized with the actual state of the client workflow.6. Completing the End-to-End ArchitectureWith the client and server components integrated, the complete system can now be viewed as a sequence of interconnected stages:Client Startup↓System Registration↓Database Client Record↓Periodic Task Check↓Task Processing↓Result...
 -
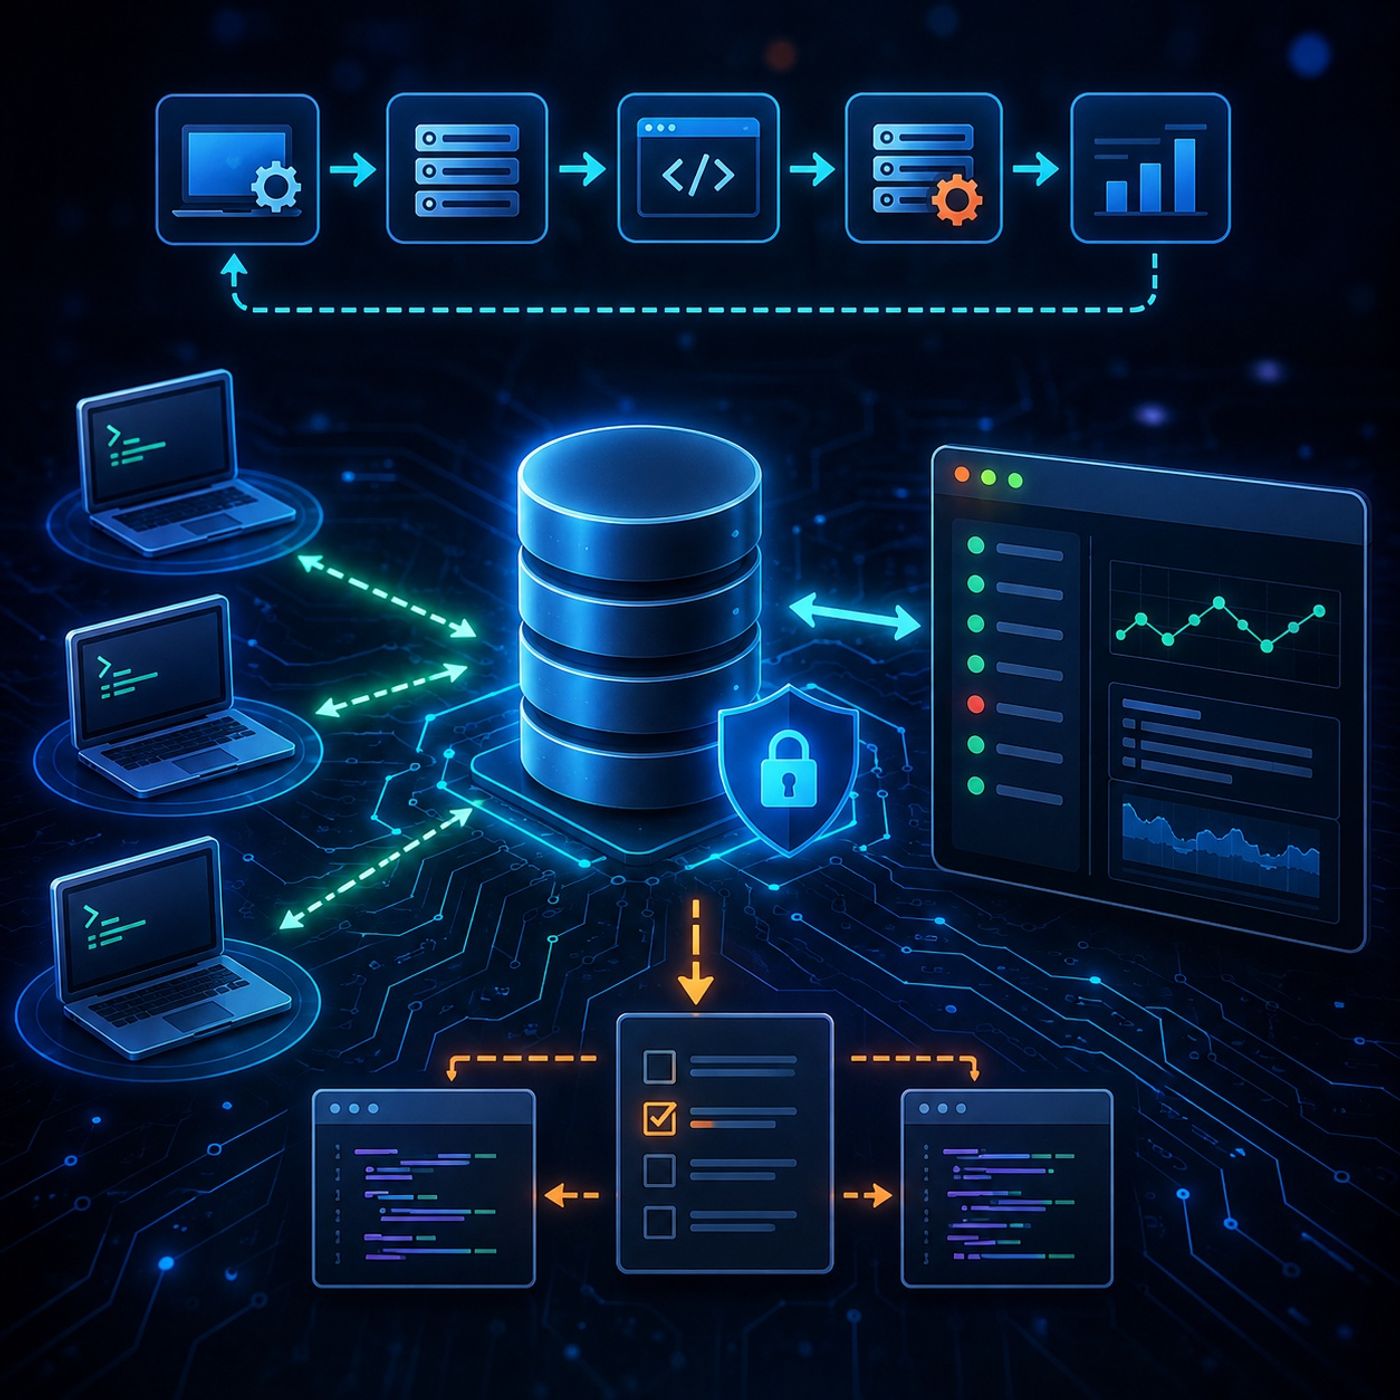 Course 43 - Practical Malware Development | Episode 8: Building a PHP Command and Control Backend 19.09.2026 22minThis episode, we bring the control-panel backend together into a complete PHP, MySQL, and JavaScript database-driven communication architecture.Building on the authentication and dashboard functionality from previous episodes, we now connect the individual components into a closed-loop workflow for registering client nodes, managing queued tasks, receiving returned results, and displaying those results through a responsive administrative interface.For security training purposes, the architecture should be deployed only in an authorized laboratory, red-team environment, or isolated research network.1. Client Node RegistrationWe begin with register.php, which acts as the gateway for registering a client with the backend.The registration process receives essential system metadata, including:Host nameIP addressOperating system informationThe submitted information is processed server-side and stored in the MySQL database using prepared statements and parameter binding.This creates a persistent database record that can subsequently be associated with tasks and returned execution results.2. Command Dispatch and Task ManagementOnce a client has been registered, get_command.php provides a mechanism for retrieving pending tasks associated with that specific client.The backend queries the database using the client's unique identifier and determines whether a command is waiting to be processed.An important part of the workflow is preventing the same queued task from being retrieved repeatedly. After a pending command is successfully fetched, the corresponding database field is cleared so that the task is treated as consumed.This introduces a basic task queue lifecycle:Queued → Retrieved → Consumed3. Receiving Execution ResultsNext, we close the communication loop with get_results.php.After processing a task, the client can submit its resulting output back to the server through a POST request.The backend identifies the appropriate database record and updates it with the returned result, allowing the administrative interface to retrieve and display the latest information.The complete data flow therefore becomes:Client Registration → Task Retrieval → Task Processing → Result Submission → Database Update4. Building the Administrative Management InterfaceWith the backend communication workflow established, we create manage.php as the administrator-facing management interface.The page provides functionality for:Selecting an individual client record.Entering a new task.Submitting that task to the backend.Monitoring the associated returned results.The interface connects the previously independent database operations into a single administrative workflow.5. Retrieving and Displaying ResultsWe then introduce show_results.php, which provides the data endpoint used by the administrative interface to retrieve updated information.Instead of requiring the administrator to manually refresh the entire page, the frontend can periodically request the latest result data in the background.6. Implementing JavaScript PollingTo make the dashboard responsive, we introduce a lightweight JavaScript polling mechanism based on XMLHttpRequest.A timer repeatedly initiates background requests at a two-second interval, allowing the interface to check for updated results without performing a complete page reload.When new information is returned, JavaScript dynamically updates the appropriate text area within the management interface.The resulting workflow is:JavaScript Timer → HTTP Request → PHP Endpoint → Database Query → Response → Dynamic UI UpdateThis demonstrates a foundational technique for building asynchronous web interfaces using traditional JavaScript APIs.7. Completing the Database-Driven ArchitectureAt the end of the episode, the individual components work together as a unified system:Registration...
 -
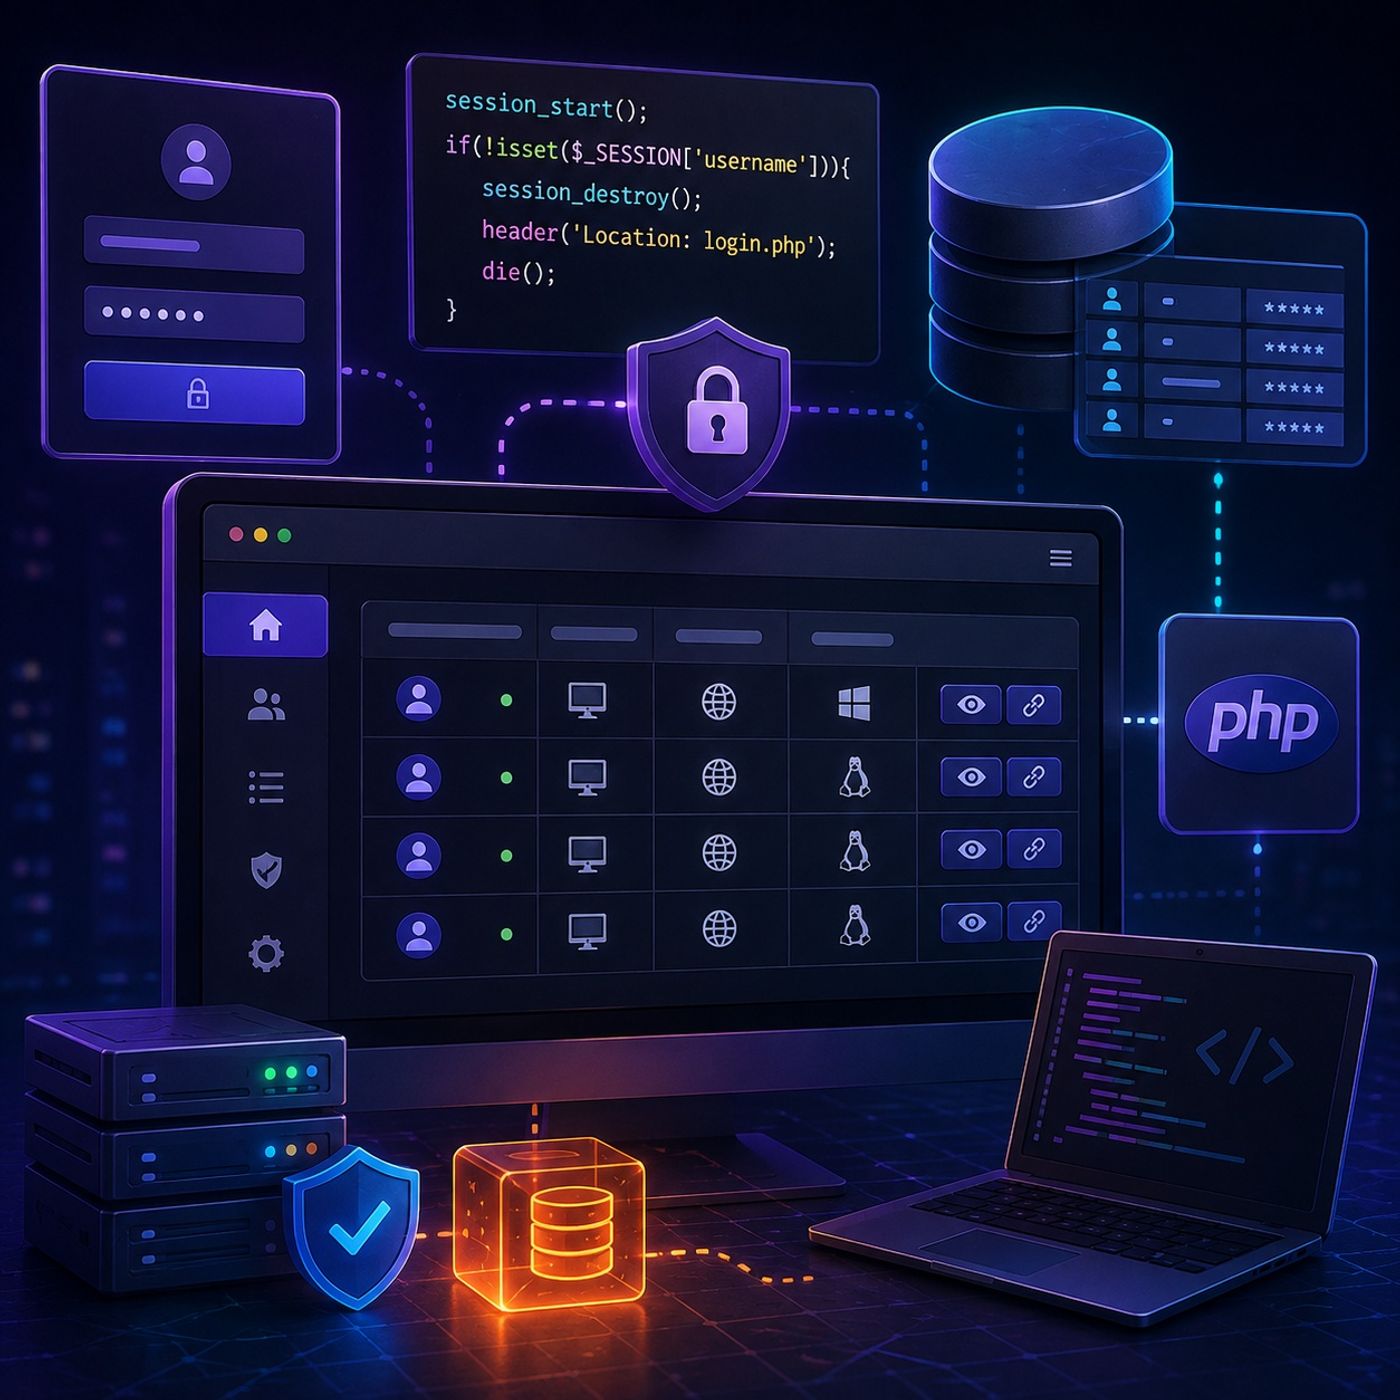 Course 43 - Practical Malware Development | Episode 7: Building a PHP Session Control Panel 18.09.2026 17minThis episode, we continue developing our PHP-based control panel by moving beyond authentication and building the authenticated administration layer.We begin by establishing administrator credentials, then implement a dedicated session-protection mechanism to secure private pages. Finally, we transform the control panel into a dynamic dashboard capable of retrieving database records and presenting them through a structured web interface.The episode demonstrates how authentication, session management, database queries, and dynamic HTML generation come together to create a functional administrative backend.1. Creating Administrator CredentialsWe start by creating the primary administrator account within the users table.Using MySQL's INSERT INTO statement, we add the required authentication information and examine how password values can be transformed before being stored in the database.The episode uses the MD5() function as part of the original implementation while also emphasizing an important security consideration: MD5 is obsolete for password storage and should be replaced with a modern password-hashing algorithm in production applications.2. Building the Session Security LayerNext, we create a dedicated authentication guard named session.php.This component protects private control-panel pages by:Starting the PHP session with session_start().Checking whether the expected session username exists.Identifying unauthenticated access attempts.Destroying invalid sessions.Redirecting unauthorized users away from protected pages.Using die() to immediately terminate script execution after the redirect.The final step is particularly important because redirecting a browser alone does not automatically stop the current PHP script from continuing to execute. Terminating execution ensures that protected content is not subsequently rendered to an unauthorized requester.3. Creating the Dynamic DashboardWith authentication and session protection in place, we build the main administrative interface in index.php.The dashboard integrates the existing PHP database connection and retrieves records from the victims table.We use PHP's database functionality to:Execute the required database query.Iterate through returned records with a while loop.Extract individual fields using fetch_assoc().Retrieve information such as Host Name, IP Address, and Operating System.Dynamically generate HTML based on the database contents.This transforms the dashboard from a static page into a real-time interface driven by database records.4. Designing the Data TableThe retrieved records are presented through a custom-styled HTML table.The table provides a structured view of the information stored in the database, making it easier for an administrator to review individual records through the web interface.We also introduce dynamic HTML generation, allowing PHP to populate the table automatically as new database records become available.5. Adding Administrative ActionsFinally, we create a dynamically generated clickable action link for each individual record.Each link is associated with the corresponding database entry and routes the administrator toward a dedicated management page.This establishes the foundation for a more advanced administrative workflow where individual records can later be inspected and managed through dedicated controls.Overall ArchitectureThe completed workflow can be summarized as:Administrator Credentials → Login Authentication → PHP Session → Session Validation → Database Query → Dynamic Dashboard → Individual Management ActionsThis architecture demonstrates how authentication and database-driven interfaces can be combined into a functional PHP administration system.Key TakeawaysBy the end of this episode, you will...
 -
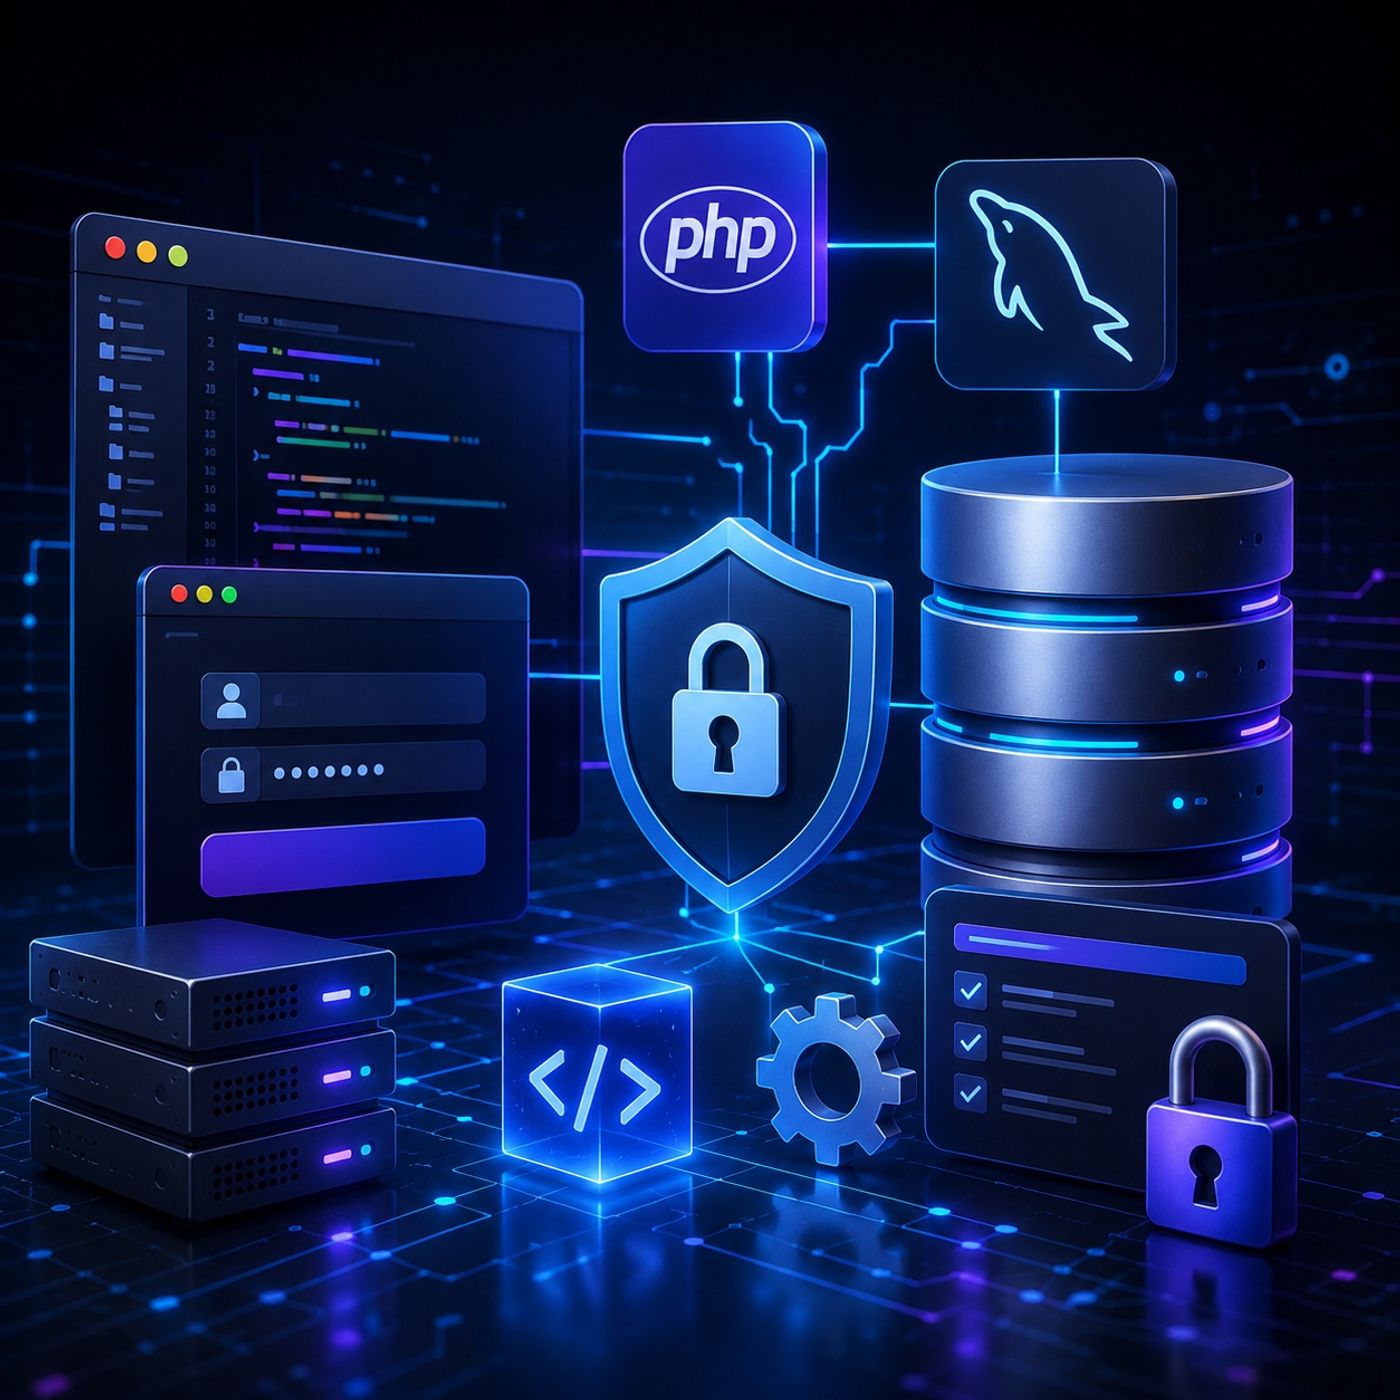 Course 43 - Practical Malware Development | Episode 6: Database Foundations and PHP Integration 17.09.2026 21minThis episode, we build a PHP and MySQL control panel backend from the ground up, progressing from database initialization and server configuration to user authentication and session management.The episode focuses on connecting a web application to a MySQL database while introducing important security concepts such as prepared statements, parameter binding, password hashing, and session-based authentication.1. Creating the Database FoundationWe begin by preparing the MySQL environment and creating a dedicated database named control_panel.The database is structured around two key tables:A users table for storing web panel authentication data.A victims table containing eight columns designed to record system information such as operating systems, IP addresses, and command-and-control activity outcomes.This database provides the foundation for both authentication and the application's monitoring functionality.2. Connecting Apache, PHP, and MySQLNext, we configure the web server and database environment so that PHP can communicate reliably with MySQL.The episode covers:Adjusting Apache directory ownership and permissions.Updating MySQL authentication configuration where necessary.Creating a reusable PHP database connection script named con.php.Implementing connection error handling to identify and report database failures.This establishes a clean separation between the application's authentication logic and its database connection layer.3. Building the Login InterfaceWith the backend database ready, we create the application's login interface using an HTML form contained in login.php.The form collects user credentials and passes them to the server-side authentication logic, where the submitted values are validated against the database.4. Implementing Secure Database QueriesA major focus of the episode is preventing SQL injection during authentication.Instead of constructing SQL queries by directly concatenating user input, we use:Prepared statementsParameter bindingServer-side credential validationThis demonstrates why parameterized database queries are an essential security practice for applications that process user-controlled input.5. Authentication and PHP SessionsAfter retrieving the appropriate user record, the application validates the supplied credentials against the stored password representation.Once authentication succeeds, we introduce PHP session management to maintain the authenticated state and securely redirect the user to the application's main page.This creates the basic authentication flow:Login Form → Server-Side Validation → Database Lookup → Credential Verification → Session Creation → Main Panel6. Password Storage and HashingThe episode also explores password hashing and the importance of protecting stored credentials rather than keeping passwords in plaintext.The original implementation demonstrates MD5 hashing, while highlighting the broader concept of transforming credentials before storing them in the database.For modern production applications, stronger password-hashing mechanisms such as Argon2id or bcrypt should be used instead of MD5.Key TakeawaysBy the end of the episode, you will understand how to:Create and structure a MySQL database for a web application.Connect PHP to MySQL through a reusable connection layer.Configure Apache and MySQL for application integration.Build an HTML/PHP login workflow.Use prepared statements and parameter binding to reduce SQL injection risk.Implement PHP session-based authentication.Handle database and authentication errors.Understand the role of password hashing in credential protection.Recognize why legacy...
 -
 Course 43 - Practical Malware Development | Episode 5: Error Handling & HTTP Polling 16.09.2026 19minThis episode moves beyond local command processing and introduces the fundamentals of network-based communication in a C# security-testing environment.The lesson begins by improving the reliability of the existing application through structured exception handling and more robust command parsing. It then examines the concepts behind periodic HTTP communication, connection monitoring, and graceful failure handling.1. Improving Application StabilityThe first section focuses on making the application more fault-tolerant.Core operations are protected with try-catch exception handling, allowing the program to detect errors without immediately terminating.The approach is applied to operations such as:File retrievalDirectory enumerationSystem command processingOther potentially error-prone operationsWhen an exception occurs, the application can retrieve the exception's message and return meaningful information about the failure.This provides an important programming lesson: applications that interact with operating-system resources or networks should anticipate failures rather than assuming every operation will succeed.2. Fixing the Command ParserThe episode then addresses a bug in the command parser.The original implementation expected every command to contain a space separating the command from an argument. Commands without an argument could therefore cause the parser to fail.The improved logic checks whether the input contains the expected separator:If an argument exists, the input is divided into command and argument components.If no separator exists, the entire input is treated as the command.The argument is initialized appropriately when it is absent.This makes the command-processing system considerably more robust.3. Improving Directory EnumerationThe directory-listing functionality is also improved.When the user does not provide a specific path, the application can fall back to the current working directory rather than attempting to process an empty path.This creates a more intuitive command-line experience while demonstrating an important programming principle: functions should define sensible defaults when optional input is missing.4. Periodic HTTP CommunicationThe second half of the episode introduces a network communication model based on periodic HTTP requests.The conceptual workflow involves:Establishing a connection to a remote service.Sending an HTTP request at regular intervals.Waiting for a defined period.Repeating the communication cycle.Handling communication failures without immediately terminating the application.The lesson uses C# networking functionality to demonstrate how applications can maintain periodic communication with a remote endpoint.From a security perspective, this behavior is important to understand because periodic outbound connections can also appear in command-and-control traffic and are therefore valuable indicators during network monitoring.5. Connection Failure HandlingNetwork connections are inherently unreliable, so the communication loop incorporates failure tracking.A connection-failure counter is used to distinguish between temporary problems and persistent connectivity failures.Conceptually:Successful Request → Reset Failure CounterFailed Request → Increment Failure CounterIf consecutive failures reach a predefined threshold, the application exits the communication loop gracefully instead of continuing indefinitely.This demonstrates a broader software-engineering principle: network-dependent applications should have clear timeouts, retry limits, and termination conditions.6. Monitoring Network ActivityThe episode concludes by demonstrating how network communication can be verified from the server side.Server logs can provide...
 -
 Course 43 - Practical Malware Development | Episode 4: System Navigation and Command Execution 15.09.2026 16minIn this episode, we build a custom interactive command-line shell in C#, exploring how applications can combine filesystem navigation, system reconnaissance, and operating-system command execution into a single interface.The episode takes a practical, step-by-step approach, beginning with basic directory operations and gradually introducing system information gathering and command execution.1. Directory NavigationWe begin by building the foundations of the custom shell around local filesystem interaction.Using C# system I/O functionality and the Directory class, we implement commands that allow the application to:Change the current directoryDisplay the current working locationList files and directoriesProcess filesystem paths dynamicallyFormat command output using StringBuilderThese components establish the basic navigation capabilities expected from a command-line environment.2. System ReconnaissanceOnce filesystem navigation is in place, we expand the shell with system-information commands.The application can query important host information, including:Operating system detailsCurrent usernameNetwork and IP informationProcess informationCurrent security and administrative privilegesThis demonstrates how C# applications can interact with Windows APIs and built-in system classes to obtain information about the environment in which they are running.3. Command ExecutionThe final stage introduces operating-system command execution through the C# Process class.The shell is designed to distinguish between its own built-in commands and commands that are not recognized internally. Unrecognized input can then be passed to the Windows command interpreter.The implementation demonstrates concepts such as:Creating and managing processesRedirecting standard outputCapturing standard errorReading process results programmaticallyPresenting command output through the custom interfaceThis creates a bridge between the C# application and the underlying operating system.4. Putting the Shell TogetherThe episode brings all three capabilities into one workflow:Directory Navigation → System Reconnaissance → Command Processing → OS InteractionRather than relying exclusively on the standard command prompt, the custom application provides its own interface for interacting with the local environment.From a cybersecurity perspective, understanding these mechanisms is particularly valuable for authorized security testing, malware analysis, and defensive research, because similar operating-system interaction techniques can appear in both legitimate administration tools and malicious software.Key TakeawaysBy the end of this episode, learners should understand how to:Build a basic command-line interface in C#Navigate the Windows filesystem programmaticallyEnumerate files and directoriesCollect system and user informationInspect process and privilege informationCreate and manage processes with the Process classCapture standard output and error streamsConnect a C# application to the Windows command interpreterThis episode provides an important foundation for understanding C# system programming and Windows security tooling, while demonstrating how relatively simple programming components can be combined to create a powerful operating-system interaction framework.You can listen and download our episodes for free on more than 10 different platforms:https://linktr.ee/cybercode_academy
 -
 Course 43 - Practical Malware Development | Episode 3: Recon, Registry Persistence, and Web Downloading 14.09.2026 20minThis episode introduces the core concepts behind offensive C# development for authorized penetration testing and red-team environments. The walkthrough follows a simplified offensive-tool lifecycle, beginning with host reconnaissance and progressing through persistence mechanisms and dynamic retrieval of additional components.The focus is on understanding how C# can interact directly with the Windows operating system and its APIs.1. Host Reconnaissance and System InformationThe episode begins with local reconnaissance using built-in C# functionality.The application demonstrates how to collect information such as:Operating system detailsComputer and host nameCurrent working directoryProcess identifierNetwork configurationIPv4 addressCurrent user's security contextThe Environment and Process classes provide convenient interfaces for retrieving system and process information.The episode also introduces:WindowsIdentityWindowsPrincipalThese classes can be used to determine whether the current process is operating with administrator-level privileges, an important consideration when assessing what actions a security tool can perform.2. Understanding Windows PersistenceThe next section examines Windows persistence from a defensive and red-team perspective.The example demonstrates how an application can interact with Windows Registry locations associated with startup execution. The application creates or modifies a registry value that references its executable, allowing the program to launch automatically when the relevant user session starts.The workflow covers:Opening registry locations with appropriate permissionsCreating or modifying registry valuesAssociating a value with an executable pathProperly releasing registry resourcesVerifying startup entries through Windows administrative interfacesThis section illustrates why registry-based persistence is an important artifact for defenders to monitor during endpoint investigations.3. Command ParsingThe episode then introduces a basic command-processing mechanism.The application receives a command and separates the command keyword from its associated argument. For example, a conceptual command such as:download can be parsed into:The requested operationThe supplied resource or argumentThis provides a foundation for applications that need to interpret structured input and execute different functionality based on the received command.4. Dynamic File RetrievalThe final technical component demonstrates how a C# application can retrieve a remote file using the WebClient class.The workflow covers:Receiving a resource locationParsing the supplied URLDetermining the remote file nameConstructing a local destinationSaving the retrieved file in the user's temporary directoryThe example uses the Windows temporary-data location under:AppData\Local\TempThe concept is particularly relevant to malware analysis because legitimate applications and malicious programs can both download secondary resources dynamically. Security analysts should therefore treat unexpected network downloads and newly created executable files as potentially important investigation artifacts.5. Offensive Tool LifecycleThe episode brings these concepts together into a simplified lifecycle:Host Reconnaissance → Privilege Assessment → Persistence → Command Processing → Resource RetrievalEach stage demonstrates a different aspect of Windows interaction through C#.From a defensive perspective, the same workflow can be used to identify useful detection opportunities, including:
Lignende podcasts


Populær i
Denne podcast optræder også i podcast-hitlister i disse lande.
